Pages

Showing posts with label tutorial. Show all posts

My Favorite {YouTube} Channels

Sunday, August 10, 2014

Yesterday I mentioned how much I love card making/crafty videos.
I love watching how people create.  Sometimes I put on a video and just listen while I create something myself.  I shared Dawn's {WPlus9} Channel and today I have a few more. 


Vicky's channel is great. I love her card making videos, but it's her art journal videos that I love watching the most.


Yana makes beautiful and unique cards. 
Love listening to her accent too!


Darlene uses many mediums and I love learning about them. 
She's the reason I had to have Inktense pencils!


Jennifer shows you how to use what you have in new ways!


Nichol makes the most elaborate scenes!


Amy does a variety of styles.  So much fun to watch!

What are some of your favorites?
I'd love to check them out.

Bokeh Made Easy

Saturday, August 9, 2014

 
On Day 1 of the WPlus9 August Release Dawn shared a video
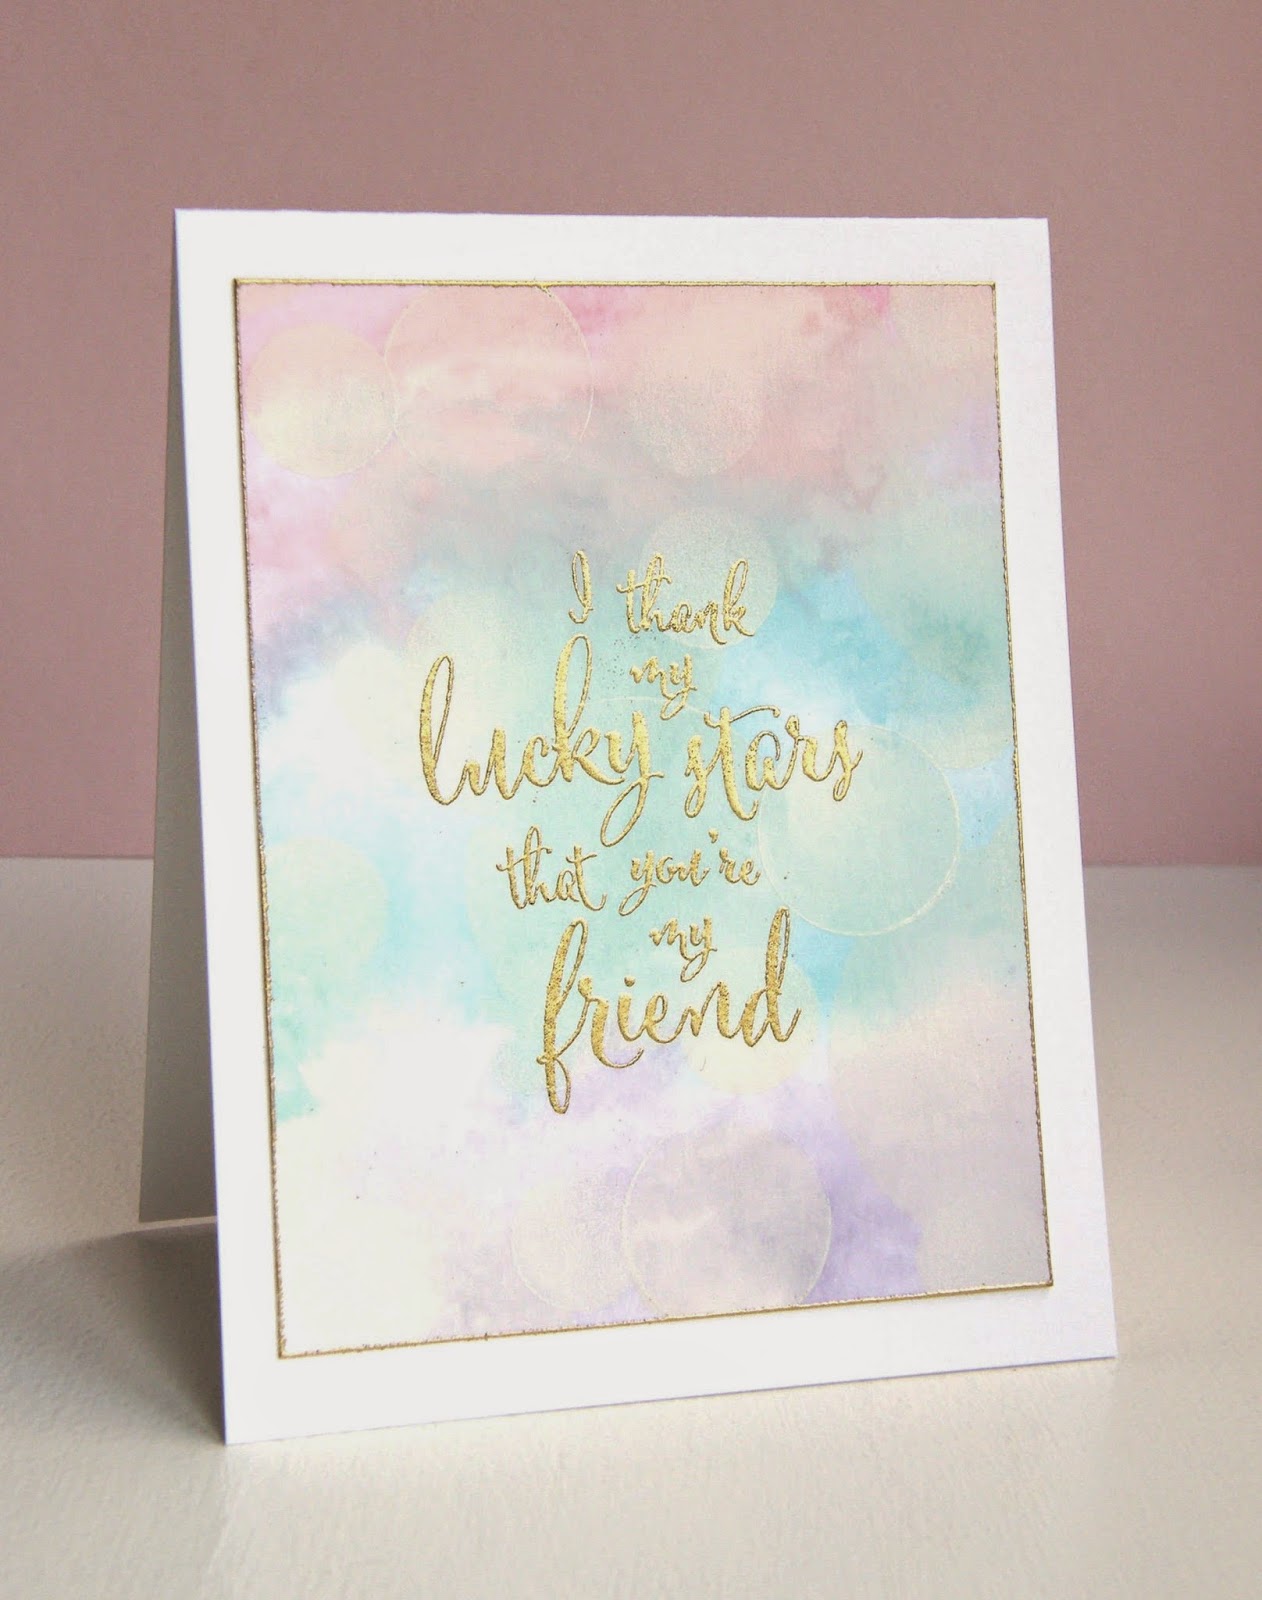
 demonstrating her technique for Bokeh Made Easy. I finally had a chance to try it.  She's right, it is easy!
The end result is so pretty and ethereal. I'd love to try it again,
but using dark colors on the background.....
Oh, great now I'm never going to get dinner started.
 
 
I created my background with Distress Ink in 3 colors
smooshed onto my craft sheet and spritzed with water.
I created a stencil using dies from several circle dies.  I added white ink over top of my dried background.  Loved the look!  I decided {once my ink was completely dry} to gold emboss my sentiment and also emboss the edges.


Watch Dawn's video here.  Make sure to stop the WPlus9 YouTube Channel for more videos. I love watching card making videos!  Do you?  I'll put together a list of my favorite channels to share with you soon!
  
 
Thanks for stopping by today.


Cardstock: WP9 White
Stamps: WP9 Lucky Stars
Ink: WP9 White Pigment Ink,TH Distress Ink Worn Lipstick, Peacock Feathers, Seedless Preserves, Versamark Embossing Ink
Dies: WP9 Papel Picado, Lawn Fawn Circle Dies
Other: Gold Filigree Embossing Powder, Finger Daubers, Acetate {to create stencil}

Doily Wreath

Friday, November 19, 2010

Isn't this beautiful?  So many people are incorporating doilies into their papercrafts these days.  Here is another way to use up your stash!
Find all the directions here: 

Checkerboard Christmas

Monday, October 4, 2010

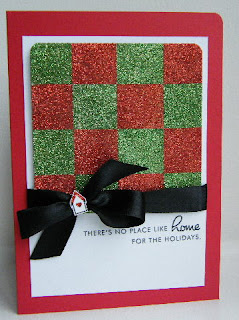
 I couldn't resist making another glitter card.  Now this isn't what I would consider a "more elaborate design" than the previous card, but it does make a cool effect.  I have to say that most of the 'wow' comes from the quality of this glitter.  Martha Stewart glitter really is a great quality glitter. 
 It has the most magnificent sparkle!
 A few people have asked for a tutorial.  Unfortunately, with work I barely have time to make the card let alone a tutorial for it:) So what I have done is taken photos of my Paper Crafts Magazine.  These photos are on page 88 of the November/December 2010 issue. 
I hope that helps!
Thanks for stopping by:)

Cardstock: PTI White, Pure Poppy
Stamps: PTI Home for the Holidays, Bird Watching
Ink: Memento Black
Other: Martha Stewart Glitter, Ribbon, Thermoweb Adhesive Sheets

Gift Topper Tutorial

Thursday, July 22, 2010


You will need:
2 strips of the same paper measuring 8 x 2inches
2 strips of a coordinating paper measuring 8 x 1 and 1/2 inches
Any border punch
Hot glue gun
Double stick tape
Circle punch

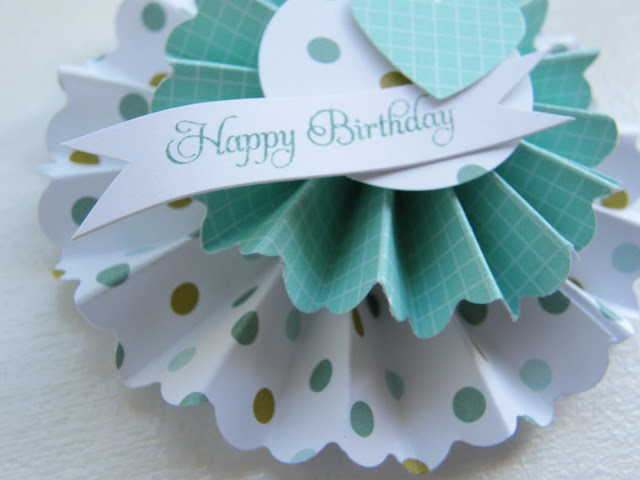
Cut paper strips. Punch one side of each of the 4 strips with any of your favorite border punches. Score each piece at each inch. Turn strip over and score at each half inch. This will give you peaks and valleys which will make the accordion folding very easy.
 
Accordion fold each piece and attach the 2 like strips to each other at both ends using double stick tape or any glue that you prefer. Using double stick tape makes an instant bond and allows you to move on to the next step immediately.
 
Lay the paper ring on your work surface punched edge down. Push down on the center to create the rosette.
 
Add a bead of hot glue to both sides of the rosette.
 
Use a piece of silicone, if you have it, to flatten the bead of hot glue. This will make the second rosette lay flat on top of the larger one.
 

Attach the two circles together, attach a punched circle to cover up the hot glue and then embellish however you like.
 
I hope that helps. If you make some, let me know. I'd love to see them!


Products used or similar {affiliate links used}


Proudly designed by | mlekoshi playground |