Pages

Thinking Of You

Sunday, September 27, 2015

 
 Just getting a project in under the wire for several challenges. {linked below}  I've been working on the new release for WPlus9 that will be available for purchase on October 5th!  Great holiday sets that I'm sure you'll love. Peeks start October 1st.  As always, though, Instagram is a great way to get a look before the official release week begins.  Dawn has done some amazing water coloring with some of the new stamps!  I also have a fun post coming up on the first with a special collaboration project with... 
You'll have to wait and see!
 
 
I hope you're having a great weekend.
Thanks so much for stopping by!


Cardstock: WP9 Black, Recollections White
Stamps: WP9 Lacey Layers, PTI Polka Dot Basics II,
PTI Graceful Greetings
Ink: Silver Lining, Fairy Dust, Falling Star, Pumpkin Spice, Black, Versamark
Dies: PTI DE Banner Die, SSS Stitched Rectangles
Other: White Embossing Powder

TGIFriday Inspiration File #237

Friday, September 25, 2015

 
Hey, TGIF! 
Start off your weekend right with some beautiful inspiration.  Week #237 of the Friday Inspiration File is full of great cards, fun techniques, and awesome card makers to follow. 
 Have a great weekend!  I hope to play along with some of my favorite challenges:
CAS-ology to name a few. 
What are your favorite challenges?


My Wednesday Wish List

Wednesday, September 23, 2015

Hey guys!
Happy Hump Day!
I knew when school started I' be slowing down a bit on my posting schedule for the first few weeks.  Throw in working on projects that I can't share yet and five days go by with out anything to share.  I miss you guys :)  I thought I'd pop in today and share a few things on my crafty wish list: some old, some new.  With each set I also included a link to a favorite project I've come across featuring that stamp set.


Do you have any of these sets?  Do you love them?
What's on your craft wish list?
See you soon!
 

Guest Designing for Top Dog Dies

Friday, September 18, 2015

 
Today I have the pleasure of guest designing for Top Dog Dies.  I have seen several of my friends using them on their projects and I was super excited when they asked me if I'd like to try out some of their newly released, exclusive dies!  They sent me an assortment of Halloween themed dies as well as a border set that can be used on so many other types of projects, not just Halloween.
 
Top Dog Dies Supplies
 
For this first project, I created a large moon backdrop for my spooky bats and tree branch, from the Bats Die Set, with a little masking.  I adhered the tree branch across the window to add dimension and depth.  The word dies were added to the inside and outside of the card so that the sentiment can be read when the card is open or closed.
 
 
Top Dog Dies Supplies
 
For my second project, I used the dies to create stencils. I started by stenciling on the moon.  When that was done, I covered up the moon and sponged on color to create my spooky night background. Then I die cut the tree branch and bats, from the Bats Die Set, from copy paper.  I applied the tree branch stencil so that part of it overlapped the moon to give the illusion that the branch is in front.  Using a sponge dauber and black ink I added color to the stencil.  I did the same for the two bats.  I used the smaller bats in the background.  In the foreground, I added a large bat die cut as well as the Happy and Halloween die cuts.
 
 
Top Dog Dies Supplies
 
For my final card I used everything! The Bats Die Set, the Halloween Die Set, the Happy Die Set, and the Borders #2 Die Set.  I created a fun layered border using the Borders #2 die cut in white, black, and orange.  I created a moon from one of the large scallops of the border die.
 
 
I had so much fun getting the opportunity
to create with Top Dog Dies!
Stop by the store.  In addition to their exclusive dies, they carry stamps and other products from some of our favorite companies.
 
 
Thanks for stopping by!


Other Supplies Used
Cardstock: WP9 White, Black, PTI Summer Sunrise
Stamps: WP9 Pocketful Halloween
Ink: WP9 Black, TH Distress Ink
Dies: SSS Stitched Rectangle Dies, WP9 Love Mom Layers Dies

Copic Refills On White Board Cardstock

Tuesday, September 15, 2015

 
Hi!
Last night I wanted to play around with a technique I discovered this time last year.  On a whim, I had purchased some white board cardstock from Michael's.  It just looked interesting.  When I got it home I had the challenge of figuring out what to do with it.  When I saw how Copic refill liquid reacted when applied to the paper I was in love!
 
 
The colors swirl, and move, and blend together so beautifully.  It dries rather quickly, but can scratch if you're not careful with how you handle it.  I added a simple embossed sentiment from a Waffle Flower stamp set. 

 
 If you're interested, I have linked the past projects below.
 
Past projects using this Copic Refill Technique:
 
Thanks so much for stopping by!


Cardstock: WP9 Black, White, Lake House, DCWV White Board
Stamps: WF On My Mark
Ink: Versamark Ink
Dies: WP9 Sunshine Layers, SSS Stitched Rectangle Dies, WP9 DE Banner
Other: Copic Refills, White Embossing Powder

WPlus9 Stamptember Exclusive {Band Camp}

Saturday, September 12, 2015


Hip Hip Hooray!
It's finally here...the WPlus9 exclusive STAMPtember stamp and die set: Band Camp.  I have quite a few projects to share.  I know you're going to love this adorable set!
 
 
 All the kids marching over the hill with their shiny shoes!


A little masking to make it look like the one girl has her arm around her friend!


Love these fun banners!


The little drummer boy on the starry background!  I used the Starry Background die as an embossing plate.


Thank you so much for visiting.
Stop by and see Kelly and Maureen
They are also showcasing this adorable set today!


Cardstock: WP9 White, Black
Stamps: WP9/SSS Band Camp
Ink: WP9 Black, Distress Ink, Memento Black
Dies: WP9 Love Mom Layers, Banner Trio, Starry Background, Landscape Border Dies, SSS Stitched Rectangles
Other: Copics, Glossy Accents, Wink Of Stella

Friday Inspiration File Week #235

Friday, September 11, 2015

 
Hey guys!
I know it's been a full week since I've posted.  The first week back to school always takes all of my time and energy.  I'm looking forward to relaxing this weekend and having some craft time.  I do have an exciting post coming up tomorrow. It's the release of the Wplus9 exclusive STAMPtember stamp set and dies.  I have four projects to share, so lots of picture after this long break.  In the meantime check out all of the awesome projects in the Friday Inspiration File from this week.  There are tons!  Thanks for stopping by.  See you tomorrow! 
 

Friday Inspiration File #234 + STAMPtember News

Friday, September 4, 2015

 
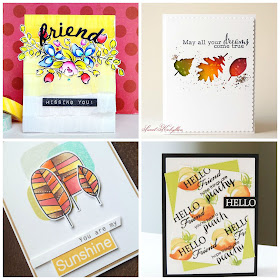
A TON of projects have been added to the Friday Inspiration File this week, #234. I think about 17 projects!  This photo just show a few from a some new {to the file} faces. 
Top Left: Tonya
Top Right: Ksenija
Bottom Left: Simon
Bottom Right: Michele
 
In other news:
STAMPtember is in full swing.  So many new products have been released and some have special release dates throughout the month.  WPlus9 has an exclusive set coming out on September 12th.  I was lucky enough to receive a copy of the set and I have been sharing sneak peeks on Instagram.  I thought I would share them with you here as well!
 
 
Have a great weekend!  We finally broke down and replaced our bed.  Our old one was 10 years old and we were both waking up in pain.  We put off buying a new one because they can be so expensive but finally said, "We've got to do it!"  The new bed was delivered this morning and I can't wait to go to sleep tonight.  Even better? Waking up tomorrow without back pain!
 

Hello {Masked Stripes}

Wednesday, September 2, 2015

 
 Hello! Just stopping in really quickly to post a card I made after work today.  Work? I know!  Summer is over and school is starting.  As much as I will miss summer, I am looking forward to the school year!
 
In order to follow the sketch I decided to do some masking.  I started by cutting a piece of inexpensive paper to the size rectangle I wanted on my card front.  I temporarily adhered it in place so that I could mask off around it.  Once that was in place I removed the rectangle and any residue from the adhesive.  I then placed another mask in a thin strip along the bottom.  Once all of my masks were in place I applied ink using a stencil.  After that, I removed all masks and stamped my sentiment. 
 
Thanks so much for stopping by today!


Cardstock: WP9 White, Black
Stamps: PTI Graceful Greetings
Ink: WP9 Sweet Gelato, Ocean Drive, Hayride, Black
Dies: SSS Stitched Rectangle Dies
Other: Heidi Swapp Stencil, Sponge Daubers, Post-It Tape, TomBow Temporary Adhesive
Proudly designed by | mlekoshi playground |